Arrabbiata/Amatriciana sauce

img_0819Today you are getting a two-for-the-price-of-one deal with a recipe for Arrabbiata sauce and Amatriciana sauce and the reason being is that they are both very similar to each other.  The only difference between the two is that one (Amatriciana) has an additional ingredient, pancetta or bacon.  One sauce is vegetarian, and the other not.

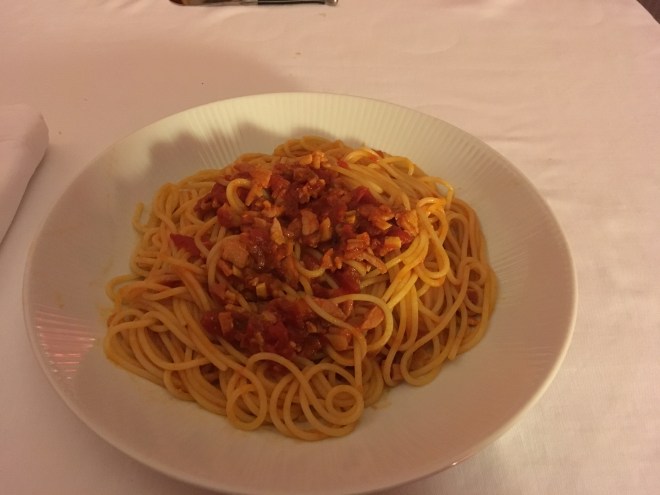
Both sauces are a little fiery.   Arrabbiata, for example, means angry and is traditionally made with garlic, chilli, tomatoes and olive oil and as such is simplicity itself.  Amatriciana is very similar in composition except that pancetta or bacon is used. Amatriciana originated in the town of Amatrice in Lazio and traditionally used guanciale which is cured pork cheek.  As that is hard to come by outside of Italy (I imagine) pancetta or bacon is used as a substitute.

The pasta that is usually employed with Arrabiata is Penne or Penne Rigati but I have also used the larger tubular Rigatoni which works equally well and I have also paired this sauce with spaghetti which is the dish I have illustrated.  The pasta that works well with Amatriciana is bucatini, favoured in Rome so I am told but spaghetti works well too.

What you’ll need for two people for Arrabbiata is:

  • Olive oil
  • 2-3 cloves of garlic peeled and finely chopped
  • 2-3 dried chillies sliced, seeds included
  • 1 x 400g/14.10oz tin tomatoes

What you’ll need to do:

  • Heat a good slug of olive oil in a saucepan and add the chopped garlic and chillies.  Cook a little to release the aroma but do not let the garlic brown.
  • Add the tomatoes and bring to a simmer then let the sauce cook for around 20-30 minutes until the liquid has evaporated and the sauces becomes pulpy.

To make the Amatriciana sauce:

  • The ingredients listed above
  • Bacon cut into strips or pancetta cut into cubes.  Use as much or as little bacon/pancetta as suits your taste.   For two people I would suggest 2 rashers of bacon per person, more if you prefer.  Cut the bacon into thin strips but not too thin.   Add the bacon to the saucepan before adding the garlic and chillies.

The bacon I use is smoked back bacon which may be difficult to find in the US so Canadian bacon will work just as well.

If you are using streaky bacon (which is the standard bacon found in the US)  fry the bacon first (before adding the garlic and chillies) which will allow the bacon fat to render then add the garlic and chillies.  If necessary add a little olive oil – then add the tomatoes and follow the steps set out for Arrabbiata above.


Pea and ham soup

fullsizeoutput_cf8

I had some ham hock which had to be used up and I wasn’t really sure what to do with it other than turn it into a pasta dish.  Then I had an idea – why not make a pea and ham soup which would be different from the traditional pea and ham soup?

The traditional pea and ham soup that most of us will remember is made using split peas, a ham hock bone and long, long cooking.  This one is simplicity itself AND it can be adapted for those who prefer a vegetarian version by using vegetable stock and omitting the ham hock.  And it is quick!  Well quicker than the two hours it takes to make the traditional version!

I had mentioned this recipe to my sister Maria and niece, Natalie, some time ago and they both have been pressing me to post it ever since.   So here it is, at last!

What you’ll need for two people is:

  • A knob of butter
  • 1 small onion peeled and chopped
  • 1 medium potato peeled and cubed
  • 500ml chicken or vegetable stock
  • 250gr frozen garden peas or petits pois
  • Salt and pepper (if required)
  • 100/150gr shredded ham hock (I used Waitrose shredded ham hock)
  • Double or single cream

What you’ll need to do:

  • Heat the butter in a saucepan then add the chopped onion and gently fry until opaque.
  • Add the stock and the potato cubes and bring to the boil, then reduce the heat to a simmer. Let the broth simmer until the potato cubes are cooked.
  • Check to see if seasoning is required and adjust to taste if necessary. (Remember there may already be salt in the stock)
  • Add the peas and bring the broth back to the boil and cook the peas for a few minutes.
  • Turn off the heat and allow the soup to cool sufficiently then either transfer to a liquidiser to blend or if you prefer, use a hand-held blender directly into the soup.*
  • Pour the soup into a clean saucepan, return to the stove and warm through prior to serving.
  • To serve pour an equal amount of soup into two soup plates or bowls then pour a little cream in the middle of the soup.  Place a portion of the ham hock onto the cream and serve.

*If you are in a bit of a hurry you can liquidise the soup whilst hot but please be careful when transferring to your liquidiser and especially careful  if you use a hand-held blender in case some of the soup splurges upward and flies out of the pan!

Bacon, haggis and egg breakfast.

img_0820Last Sunday I decided to put together a naughty fried breakfast from ingredients that I had in my freezer (a slice of haggis) and fridge (bacon and eggs).  Not an every-day breakfast but delicious!

If you like haggis (which I do, naturally, otherwise it wouldn’t appear here) the only way you would most likely get it south of the Scottish border was in preparation for Burns Night (25th January) and in the traditional style of a rather large haggis – one to feed three or four people.   That has all changed now because the canny haggis makers of Edinburgh, MacSween, have, for a while now, produced MacSween haggis-in-a-hurry which are two slices of haggis cleverly vacuum packed to be microwaved.  And here is a handy tip.  If you only want one portion, carefully cut the package in two with kitchen scissors – ensuring that both pockets remain sealed – then pop the one slice, not required, into the freezer for another time.

Vegetarian readers don’t despair!  You can enjoy this dish too because MacSween make a vegetarian haggis as well as the traditional haggis.  All you need do is swap the traditional for the vegetarian haggis and dump the bacon – simples!

Here in the UK you can buy MacSweens haggis in Sainsbury, Morrisons, Asda and Waitrose

What you’ll need for two is:

  • 2 slices of white bread (brown is healthier, white is naughtiest and therefore more delicious!)
  • Sunflower/vegetable oil for frying
  • 1 pack of MacSween haggis in-a-hurry
  • 4 rashers of bacon (I like smoked bacon)
  • 2 eggs (if you have duck eggs even better!)
  • Chopped chives – optional

What you’ll need to do:

  • Heat a large frying pan, or if you have one, a large griddle pan and pour some oil into it.  Fry the slices of bread until golden brown on both sides and keep warm.
  • In another frying pan fry the bacon – or grill if you prefer.
  • Transfer the bacon to a warm dish or plate, add more oil and fry your eggs.  This way you’ll save on frying pans but if you have a devil-may-care attitude and own a brigade of frying pans, well, use a third!
  • Remove the cardboard sleeve of the haggis and place package in the microwave and cook according to the timings on the packet
  • Assemble breakfast with, first,  the slice of fried bread, then the rashers of bacon, then a slice of haggis and top it with a fried egg.
  • Sprinkle with chopped chives if you wish.

Amuse-bouche: Seared goose liver with fig jam.


I invited my friend, Joy, round to supper on Friday and I had decided that I would make steak and kidney pie and as I rummaged around my freezer (for I knew I had kidneys therein as well as the beef) I pulled out what I thought was a very small pack of kidney.  To my surprise (for I had not labelled the pack) I discovered, once it had defrosted, that is was a goose liver I had vacuum packed and put into the freezer  when I had bought a goose  two Christmases ago. The goose, however, is long gone!

Here is the recipe for the seared liver.  Well, I don’t think it can really be called a recipe more a suggestion as to what to do with that goose liver you may find lurking in your freezer!

What you’ll need for two people as a mini first course – the amuse-bouche is:

  • Large frying pan (I used my large, round flat griddle pan)
  • 1 goose or duck liver cut in two*
  • 1 large slice of bread, crusts removed and cut in half
  • Butter**
  • Fig jam
  • Chopped chives – optional

What you’ll need to do:

  • Place a teaspoon of fig jam on your serving plates and keep plates to one side
  • Melt the butter in the pan and place the two pieces of bread to fry. When light golden turn over and fry the other side of the bread
  • Once you have turned the bread over to fry the second side place the liver pieces on the griddle to sear quickly, turn over and sear the other side.  The liver should be pink inside and not over-cooked.
  • Place a piece of fried bread on each plate and top with a piece of liver and sprinkle with chopped chives if liked.

*Depending how large your goose may be (goose liver usually only comes with a goose, I don’t think I have seen it sold separately here in the UK) you may have enough for 3 to 4 people)

**I use clarified butter as it can be cooked to a higher temperature without burning – very good for searing.

img_0816

Spicy broth with prawns or chicken or without.

img_0787
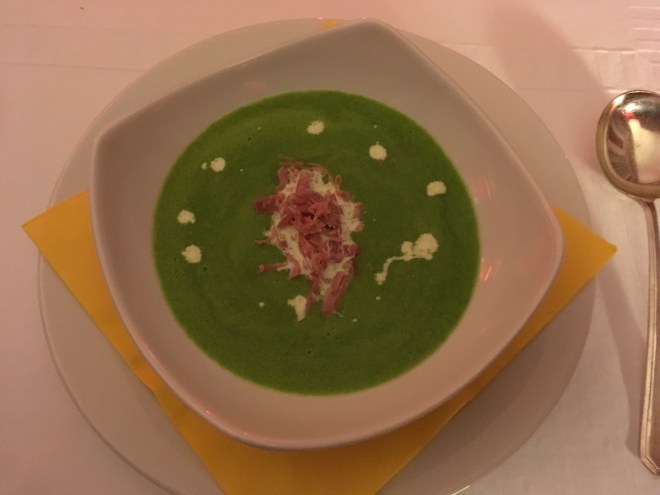
I created this soup as part of my repertoire for my 5:2 diet regime – a dish that is so straight-forward  it really doesn’t require much thinking about and provides me with a dinner of around 600 calories, maybe fewer.   Though you might not think it by the sound of it a full portion of this soup is a pretty substantial meal.

And the beauty of this soup is that it can be vegetarian by excluding the prawns or chicken and using vegetable stock instead of chicken stock.

What you’ll need for 2 people as a first course or for a main meal for 1 person is:

  • 500ml chicken or vegetable stock
  • A little vegetable oil for cooking
  • 1-2 cloves of garlic peeled and thinly sliced
  • 1 red or green chilli chopped – I use Thai chillis
  • 6 to 12 large raw or cooked prawns (12 if the soup is to be shared) or 100gr – 150 gr shredded cooked chicken breast. (Thigh meat can be used too of course)
  • Soy sauce (about a dessert spoonful  or more to taste)
  • Half a carrot peeled and diced*
  • 1 -2 teaspoonfuls of Sriracha Hot Chilli Sauce (optional)**
  • 2-3 Cavolo Nero leaves sliced or any other green leaves you may have to hand such as kale or Swiss Chard
  • Half a pack of mixed exotic mushrooms (Eryngii, Shiitake & Oyster were in the pack I had and which can be bought from Waitrose) or any assortment of mushrooms you fancy.  Slice the mushrooms.
  • 1 nest of Rice Vermicelli noodles (I use the Thai Taste brand)
  • Handful of coriander or chives chopped for garnish if liked.

*You may like to substitute the carrot with fennel or celery

**When I made this a few days ago I decided to add a bit more zip to the broth by adding a teaspoon or two of the Sriracha Chilli Sauce and it was even more delicious but do take care, the Thai chilli is heat enough.

What you’ll need to do:

  • Make up your 500ml of stock and have it to hand.
  • In a saucepan (large enough to take 500ml of liquid plus the ingredients) heat a little of the vegetable oil and gently fry the garlic and chilli to release the fragrance.  Try not to let the garlic brown because  it will taste bitter.
  • Add the chicken/vegetable stock and bring to the boil then reduce to a simmer.
  • Add the soy sauce to taste.  (Be careful in the amount you use due to its saltiness)
  • Add the diced carrots and sliced mushrooms.  Continue to simmer for 10-15 minutes to allow the vegetables to cook.
  • Add the prawns or chicken if using.  (If using raw prawns they will turn pink when cooked.  If using cooked chicken ensure that it is heated through thoroughly)
  • Add the chopped Cavolo Nero leaves
  • Whilst the broth is simmering bring a small saucepan of water to boil.  Once boiled turn off the heat and drop the nest of vermicelli into the hot water, place a lid of top and leave for 10 minutes or follow the recommended time on the packet. when the time is up drain the vermicelli and keep warm.
  • Once the broth is ready divide the vermicelli noodles between two soup plates or bowls (or just one large bowl if it is a main mean) and ladle the soup over the noodles.
  • Sprinkle the chopped coriander leaves or chives over each portion and serve.


Bigoli in Salsa

img_0772
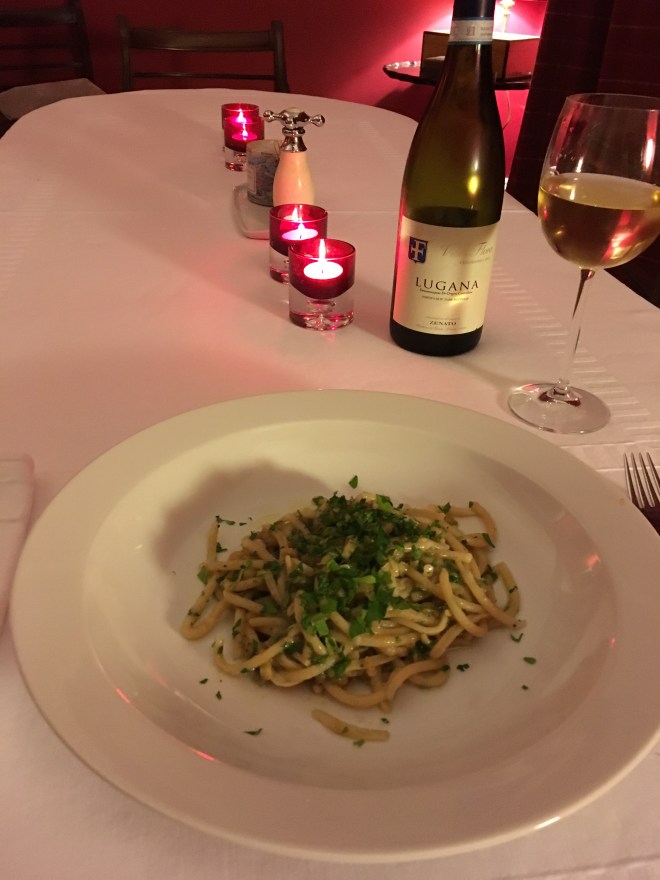
First I would like to wish you a happy New Year and apologise for the paucity of recipes since I started last May!

To my family and friends who have gently reminded me from time-to-time to get on with posting recipes, thank you for your gentle chiding – here we go!

I have wanted to try this recipe for a while since watching Rick Stein cook it in Venice during his From Venice to Istanbul television series for the BBC.  It has become one of Mr. Stein’s favourite dishes and having cooked it last night, I can see why.  It is incredibly easy to cook and absolutely delicious!

Bigoli is a type of pasta made in Venice.  It is rather like thick spaghetti and quite difficult to get hold of outside of Venice.  I happen to have some Pici Senesi which is a Tuscan pasta almost the same – a speciality of Siena where I bought it last year and which I used last night.  If you haven’t got any bigoli or pici senesi lurking in your larder Mr. Stein suggests using bucatini instead but I am quite confident that good old spaghetti will do the job just as well though the sauce does lend itself very well to a thicker type of pasta.

fullsizeoutput_cfd
Pici Senesi from Sienna

What you’ll need for two people as a main course or  four people as a first course is:

  • 200 – 250g (depending on how hungry you are) of either bigoli, pici senesi, bucatini or spaghetti
  • Salt for the pasta water.
  • 60ml olive oil
  • 1 large onion finely chopped
  • 1-2 cloves of garlic finely chopped
  • 8 anchovy fillets (tinned).  NB There are usually about 8 fillets in the small oblong tins you buy in the supermarkets.  Just in case, have a spare tin to hand.
  • 250ml chicken stock
  • Black pepper – around 10 twists of the mill.
  • Small bunch of flat-leaf parsley chopped.

What you’ll need to do:

  • Bring a large pan of salted water to boil for the pasta.
  • In a large frying pan heat the olive oil over a medium heat and then add the onion and garlic.  Cook slowly for 10-15 minutes until soft.
  • Add the anchovies giving them a good stir round the pan which will help break them up.  Interestingly anchovies very quickly start to break down once introduced to heat.
  • Add the chicken stock and let the sauce simmer until two-thirds of the liquid has evaporated.  What you want is a nice glossy coating sauce.
  • Taste and season with black pepper then set aside and keep warm whilst the pasta is cooking
  • Cook the pasta you have chosen until al dente or to your liking.  (If you are using bigoli or pici senesi for the first time you may be surprised by the length of time it takes to cook – about 23 or more minutes for the pici senesi for example)
  • Drain the pasta and add to the sauce.  Coat the pasta  with the sauce whilst stirring in three-quarters of the parsley.
  • Sprinkle the remaining parsley on top of each portion when serving.

I did not include salt in the list of ingredients other than for the pasta water because the saltiness of the anchovies and any salt in the chicken stock is sufficient for the dish.  If you think you may need more salt then add it at the black pepper stage but I don’t think that you will.

As you can see I drank the delicious Lugana (Zenato Villa Flora) from Lake Garda – available from Waitrose.


Potatoes roasted with garlic and rosemary

2016-05-23 20.20.44
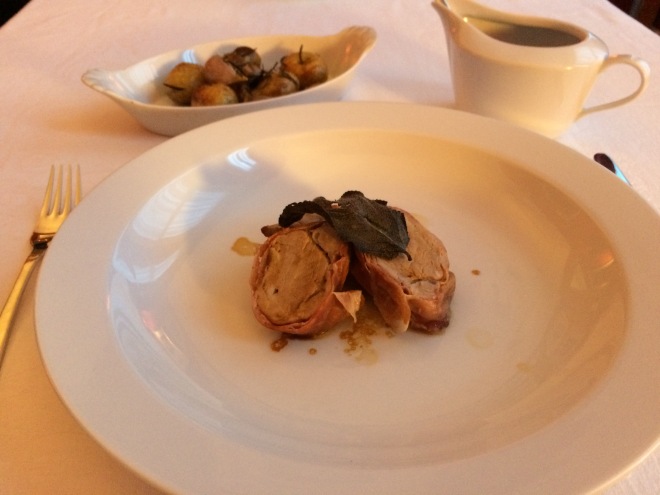
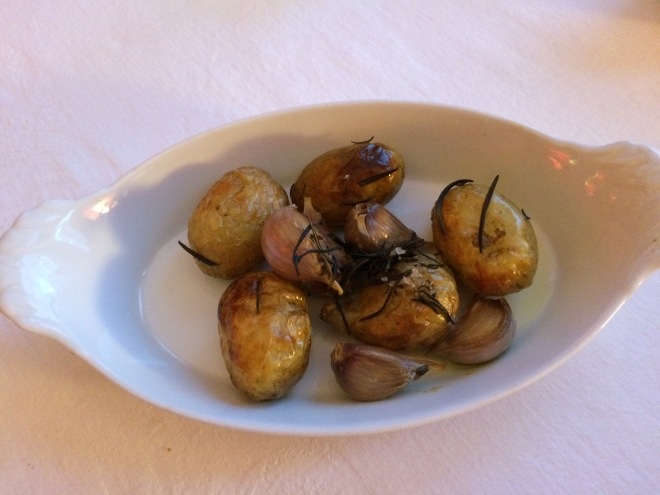
Another simple dish which goes nicely with the pork fillet and Parma ham dish just posted.  And with other dishes as well.

What you’ll need for 4 people:

  • Waxy potatoes such as the Charlotte variety with skin left on.  How many spuds?  If you think 114g/4oz per guest is sufficient then go with that but if you think you should serve more perhaps 170g/60z per guest.  Don’t worry if you have any left over, they’ll be just as delicious cold.
  • 1 – 2 bulbs of garlic
  • Sprigs of fresh rosemary (but if you can’t get hold of any, dried will be fine too)
  • Olive oil
  • Salt – sea salt/coarse salt if you have it

What you’ll need do:

  • Pre-heat your oven to 200C/392F
  • Split the garlic bulbs into individual cloves ensuring that all the papery outer skin is removed but the actual skin left on each clove.
  • Give the potatoes a quick rinse in cold water.  Or don’t bother if you don’t want to.  I often don’t!
  • Pop the potatoes into a roasting tin.  Throw in the garlic cloves (as many or as few as you like but do remember that once they have been roasted the flavour will be mellow and creamy so the more the better – yum yum!)
  • Sprinkle salt over the potatoes and garlic.
  • Slug some olive oil over the contents of the pan and throughly coat the spuds and garlic in the oil.
  • Put the sprigs of rosemary on top.  If you are using dried rosemary use sparingly (dried herbs are stronger in flavour than fresh) and put in with the salt so it will be mixed along with the olive oil.

    2016-05-23 19.00.49
    A small portion, for one person, before going into the oven.
  • Pop the roasting tin into the oven and roast for around 40 minutes.  NB If the potatoes are on the smaller side then I would recommend that you test the potatoes after about 25- 30 minutes.   You don’t want them charred and shrivelled nor too the garlic which may end up tasting bitter if burned.  Oh yes, test by sticking the point of a small sharp knife into a potatoes the same as you would testing to see if a boiled potato is done.
  • Once cooked turn out the potatoes and garlic into a serving dish discarding the rosemary sprigs along the way and present to your admiring guest. Tra-la!


Roasted pork fillet/tenderloin wrapped in Parma ham

2016-05-23 20.22.17
The finished dish!

I spent last weekend as a guest of my friends Kate and Steve in Marlow.  We, along with a gang of friends, had been invited to spend Saturday celebrating our chum Mike’s birthday in Cookham at the Let’s Rock the Moor retro festival.

During breakfast yesterday Kate mentioned that her brother was coming to lunch and she didn’t know what to cook though Kate did think she would like to cook pork and asked for suggestions.  Diana (another chum) suggested roast pork with Parma ham which is  an easy dish to prepare though I am not at all sure Diana has ever prepared it herself!

So, for you Kate, here is the recipe.  I cooked the dish this evening having, by chance, a piece of pork fillet in the ‘fridge which needed attention!

What you’ll need for 4 people:

  • 2 pork fillets/tenderloin.  Fillets vary in size and thickness so choose the size to accommodate your guests’ appetites.  (The smallest fillets would probably be around 338gr/12oz which would serve 2 people.  Take into account shrinkage in cooking when choosing your fillets).
  • 8-10 slices of Parma ham (4-5 per fillet and dependent upon the size and thickness of the fillets you’ve chosen have a few extra slices handy in case they are needed*).
  • 2 cloves of garlic sliced thinly.
  • Sage.

What you’ll need to do:

  • Pre-heat your oven to 180C/356F.
  • Pat the pork fillets dry with kitchen paper and remove, carefully, any silvery tissue on the surface of the fillet.
  • With a small sharp knife make several incisions into the fillet (not too deep) and insert a slice of garlic into each pocket.2016-05-23 19.07.18
  • On a chopping board or flat surface carefully place slices of Parma ham to accommodate the fillet.  Overlap each slice of ham slightly to make it appear to be one long piece of ham so to speak.   Carefully wrap the fillet in the ham, at an angle so that the whole fillet is wrapped in its blanket of ham. Repeat for the second fillet.

    2016-05-23 19.10.39
    Pork fillet wrapped, at an angle, in the Parma ham.
  • Select 4 sage leaves and place on top of the fillet, slightly apart, and secure each leaf with a cocktail stick.2016-05-23 19.14.00
  • Select a roasting tin that will accommodate the fillets and line with cooking foil.  Place fillets on the foil and make a loose parcel.  Pop into the hot oven and cook for approximately 20 minutes.  After 20 minutes remove from the oven and open the foil and put the pork back into the oven for another 5 to 10 minutes.  After that check to see that the juices run clear and if they do your pork will be ready.
  • Once you are happy that the pork is cooked cover with the foil and let the fillets rest for 10-15 minutes in a warm place.

    2016-05-23 20.16.53
    The fillet, rested, and ready for slicing.
  • When ready to serve slice the fillets in even, thick slices.  I would suggest three slice per guest to start with. Oh yes, don’t forget to remove the cocktail sticks.

To accompany this dish you could serve potatoes roasted with garlic and rosemary (see next post).  Caramelised carrots would go nicely as well, so too steamed stem broccoli. As there will be very little by way of natural juices from the pork I would suggest you serve apple sauce along with it.

*If you find you have extra slices of Parma ham left over they can be pressed into service as a first course served with fresh figs which have been cut across the top with a criss-cross incision, squeezed open gently to form a pocket or bowl  into which you pour in a little liquid honey.  Scrummy.  Oh yes, you could also plop a dollop of crème fraîche alongside!  I’ll post the recipe as soon as figs come into season – maybe my lovely friend and neighbour, Joy, will have a bumper crop this summer – Kent figs are delish!


Spaghetti Carbonara

2016-05-15 19.48.15Keeping to the theme of easy recipes I thought I would launch my blog with one for Spaghetti Carbonara taught to me by my chum, Tommy, from Zürich.

This recipe is for the classic carbonara which is a light dish and bears no resemblance to what is often found on restaurant menus doused in litres of cream.

The origin of the name of the dish is obscure and debates continue as to whether it was, in fact, invented by charcoalmen (Carbonari) but it seems certain that the dish was created in Rome.  As to its arrival in this world  the recipe appeared in Elizabeth Davis’s Italian Food published in the UK in 1954 but it did not feature in Ada Boni’s classic La Cucina Romana of 1930.

The dish is simplicity itself and requires only the following:

Ingredients for 2 people:

  • 2 eggs
  • 4 rashers of bacon (smoked or unsmoked as preferred) sliced into strips or use cubed pancetta if you like.  If you like a bit more bacon,then add another slice per person – as you like it!
  • a little olive oil
  • a handful of flat-leaf parsley chopped as fine as you can get it
  • 30g/1 oz Parmesan cheese grated or Grana Padano (which is less expensive than Parmesan)
  • 170g/6 oz spaghetti (depending on how hungry you may be, add or subtract the amount of spaghetti)
  • black pepper

Method:

  • Put a large saucepan of salted water on the stove and bring to a boil. (It is important that there is plenty of water to cook your spaghetti).
  • Whilst the pasta water is coming to a boil, in a mixing bowl break the eggs and whisk with a fork.  Mix in the grated cheese, the parsley and a few twists of pepper to taste.  NB I would not recommend that you add salt because the cheese will be seasoning enough.
  • Put a little olive oil into a frying pan and fry the bacon strips until a little crispy.  If you are using pancetta just pop that into the frying pan, without the oil, because it will have plenty of its own fat in which to fry.  Once cooked to your liking, set aside and keep warm.
  • Once the water has come to a boil add the spaghetti and give it a good stir round and allow to cook according to the instructions on the packet/taste.
  • When the spaghetti is cooked drain in a colander and then return it to the saucepan making sure the heat is turned off beneath the saucepan.    Pop the bacon/pancetta into the saucepan followed by the egg mixture.  Stir thoroughly ensuring the spaghetti is coated.  The trick is to have the egg mixture emulsify and hot through but not let it get over-cooked that it turns a little into scrambled eggs!
  • Divide into two bowls and throughly enjoy along with a glass or two of wine.

Ps This can easily be made for one person simply by using one egg and dividing the ingredients accordingly.


Welcome!

Welcome to Cooking with Jules.

I decided to start this blog to share easy recipes and cooking tips I’ve picked up over the years and to encourage as many people to take to the mixing bowl, the wooden spoon and the cooker once again.  Some find cooking a bit daunting, some say they have little time to cook and rely on prepared supermarket meals which is a shame and I’d like to help change that.

With a little preparation, a kitchen chum (me) and a glass of Chef’s wine, we can do wonders!

Best wishes

Jules